In this post we talk about what you need to create great product photos. If you haven’t read why you need them, head there first.
Luckily, you don’t need to break the bank to create polished DIY photos. You just need a handful of things to start out and chances are you already have a few:

- Camera or smartphone
- Tripod
- Background
- Lighting
- Lighting Props
- Table
- Tape or clips
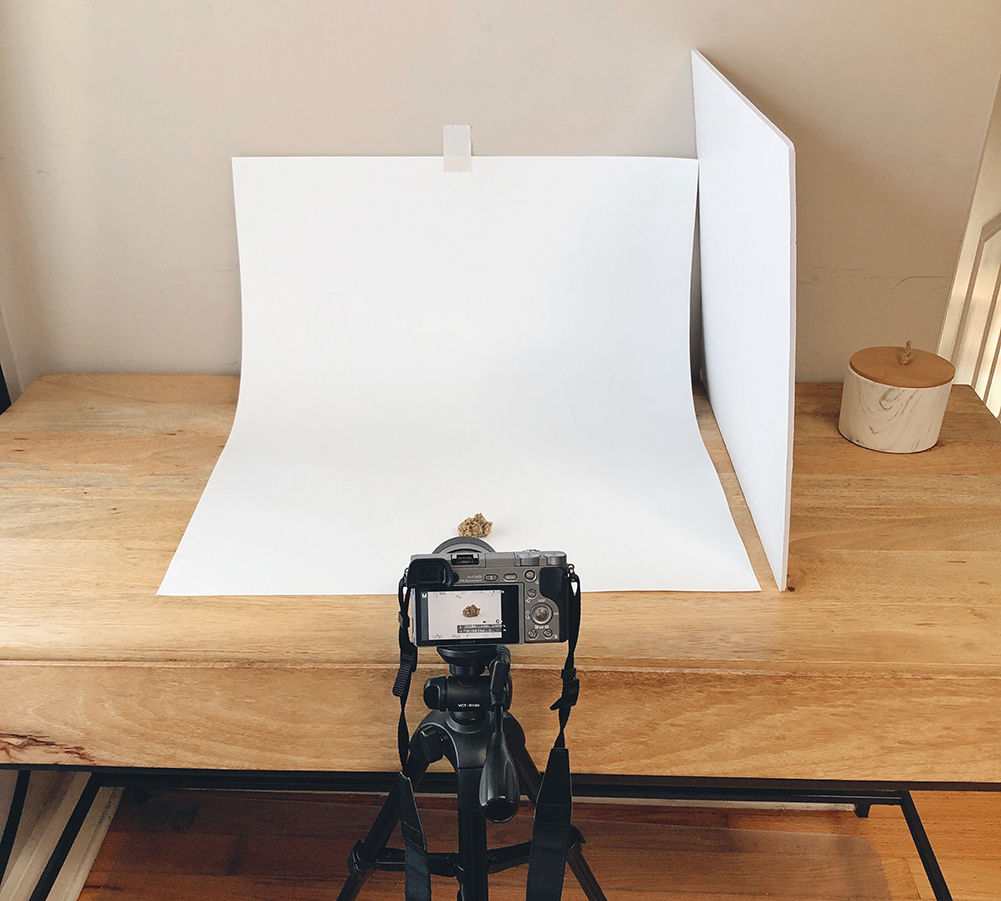
Here are the items we used in our setup above:
- Sony Alpha a6000 Mirrorless Digital Camera (we used our fancy camera, but your smartphone camera will totally do the job too)
- Sigma 30mm f/1.4 Prime Lens (good for close up shots)
- Sony Tripod
- Pacon White Plastic Poster Board as background sweep
- The sun!
- Neewer Light Diffuser (also comes with reflectors)
- Elmer’s White Foam Board as reflector/bounce card
- Duck Tape
Here are some products that we didn’t use but also work well:
- Macro lens for smartphone (to get close up details)
- Tripod for smartphone
- Seamless Background paper
- Lightbox with background, tripod and lighting
- DIY lightbox for less than $10
Our setup cost was ~$950, however, using your smartphone camera would reduce costs significantly. For example, getting the macro lens for your smartphone and lightbox with background, tripod and lighting (listed above) would only cost ~$150 and would still provide polished, professional photos. Whatever your setup, make sure that it’s easy to replicate as new products come in. If you have any questions or need recommendations, feel free to reach out.
And stay tuned for part 3 of this series where we go over how to take good photos. We’ll also share some from this shoot!